- Demo Video
- Registration
- Add Files and Folders
- Add Words to Highlighter
- Format Words list
- Use File Folder Options
- Deactivate Software
How to Highlight Words in multiple word files?
Q.1. How to Register, Buy and Activate the software ?
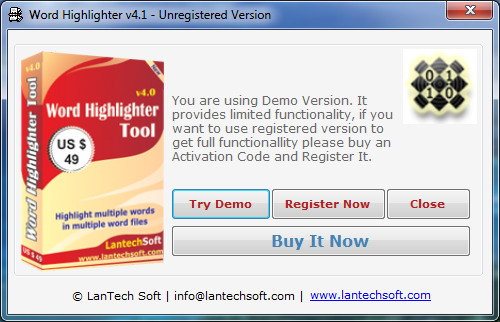
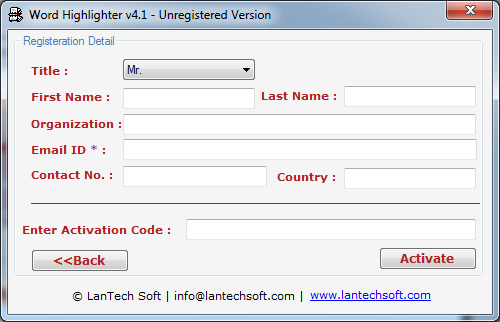
Register: To register the "Word Highlighter Tool" click on the "Activate Application" Button and fill the Registration Detail with the Activation Code
Buy : You have to Buy "Word Highlighter Tool" to get Activation Code. You Can Buy it From our Site by Clicking on "Buy Activation Key" button.
Try Demo: You can use demo version of "Word Highlighter Tool" by clicking on "Continue in Demo Version" Button.


Q.2. How to Add Multiple Word Files?
We made this version more user friendly with its new stepwise process. It has Three steps:
Step 1: Add Files (PPT).
Step 2: Add or Load Words (CSV/TXT).
Step 3: Format Words & Final Process.
Step 4: Final.
Step 1: Add Files In this step you can add MS Word (.doc, .docx, .rtf) files, just click on "Add Files" button to open file dialog box select files you want to add, you can select multiple files. You can also add all files of a selected folder by clicking on "Add Folder" button, it automatically search the selecte folder and add all MS Word Files.
Remove Selected : In this step you can add MS Word (.doc, .docx, .rtf) files, just click on "Add Files" button to open file dialog box select files you want to add, you can select multiple files. You can also add all files of a selected folder by clicking on "Add Folder" button, it automatically search the selecte folder and add all MS Word Files.
Clear File List : In this step you can add MS Word (.doc, .docx, .rtf) files, just click on "Add Files" button to open file dialog box select files you want to add, you can select multiple files. You can also add all files of a selected folder by clicking on "Add Folder" button, it automatically search the selecte folder and add all MS Word Files.
Clear Previous Highlight from files:In this step you can add MS Word (.doc, .docx, .rtf) files, just click on "Add Files" button to open file dialog box select files you want to add, you can select multiple files. You can also add all files of a selected folder by clicking on "Add Folder" button, it automatically search the selecte folder and add all MS Word Files.
Add Words : Press "Add Words" button to go to next Step. Step 3 : Format Words & Final Process.


Q.3. How to Add Words to the Word Highlighter?
Step 2 : Add Words - In this step you can add words or phrase, you can add words one by one or from a Comma/Line Separated Text file. You can type word and press enter or click "Add" button to add the same on Word List below. To add Words from TXT file just click on "Enter Comma/Line Separated File" radio button and than press "Open File to Add Words", select you file, all words will be automatically listed in Word List below.

Select All Words : Check this option to select all Words.
Remove : You can remove the checked words from the word list, to select multiple words in word list use Ctrl or Shift key. You can also remove words by pressing DEL key from Keyboard.
Clear All : Press it to remove all words from list. You can also remove words by pressing DEL key from Keyboard.
Format Words: Press this button to add all checked words to Preview Word List and to goto next Step.

Q.4. How to Format Word in the Word Highlighter?
Step 1 : Format Words - In this step you can format or highlight your selected words or phrases. You can apply formatting or highlighting on each word with different colors and style or you can apply the same to all words. To apply formatting and preview it, select words and righ-click to show formatting bar choose your color and style, words will automatically changed. If you want to apply same formatting to all words just press "Apply to All" button.
Right-Click or Left-Click : Open format bar for selected words.
Clear List : You remove all words or formatting.
Match Case : To apply match case option to selected words.
Match Whole : To apply match Whole Words only option to selected words.
Final : Final: To goto Next Step.

Q.4. How to use File Folder Options?
Step 1 : Final - This is the Final Step, Jus press "Start" button to open the "File Folder Options" See Fig. 5.
Process all Files in a Separate Folder : Check this option if you want to process all files in a single separate folder. Click on Browse button to select the folder. In this option all processed files name include a counter and suffix like "1_WH_1.doc", "1_WH_2.docx", "2_WH_3.doc"
Process in Same Folder : Check this option if you want to process all files in their native folder.
Define Custom Suffix: You can define your own initial to processed files, if you leave blank by default "WH" will be added in the end of all files name.
Create Log File :Check this option if you want to create a log files for analyzing your file and word process.
Overwrite : Check this option if you are reprocessing the same files. It will overwrite previous files.
Start Process : Press "Start Process" to start the highlighting process.
Stop Process: To Stop the highlighting process.
Open Processed Folder: To open Separate Folder which will be selected to save the processed files.

Q.5. How to Deactivate Software to transfer to other PC?
Go to Help Menu. Now click on Deactivate option.
Step 1 : Deactivate from current PC.
Step 2 : Install the software on new PC and Register it with same Activation Key.


